Quick Intro: This guide provides a step-by-step tutorial on how to self-host Cap, an open-source Loom alternative, on your Synology NAS using Docker Compose. Achieve seamless screen recording and instant sharing, complete with solutions for 5 common deployment pitfalls and a full local large language model (LLM) integration — all with zero external API dependencies.
Why Choose Cap?
If you’ve ever used Loom, you’ll know the buttery-smooth experience of “record screen → auto-generate link → instant share.” However, Loom’s free tier comes with recording duration limits, its paid version can cost upwards of $10-20 USD per month, and your recordings are stored on a third-party server. For teams or individuals concerned about privacy, this can be a significant drawback.
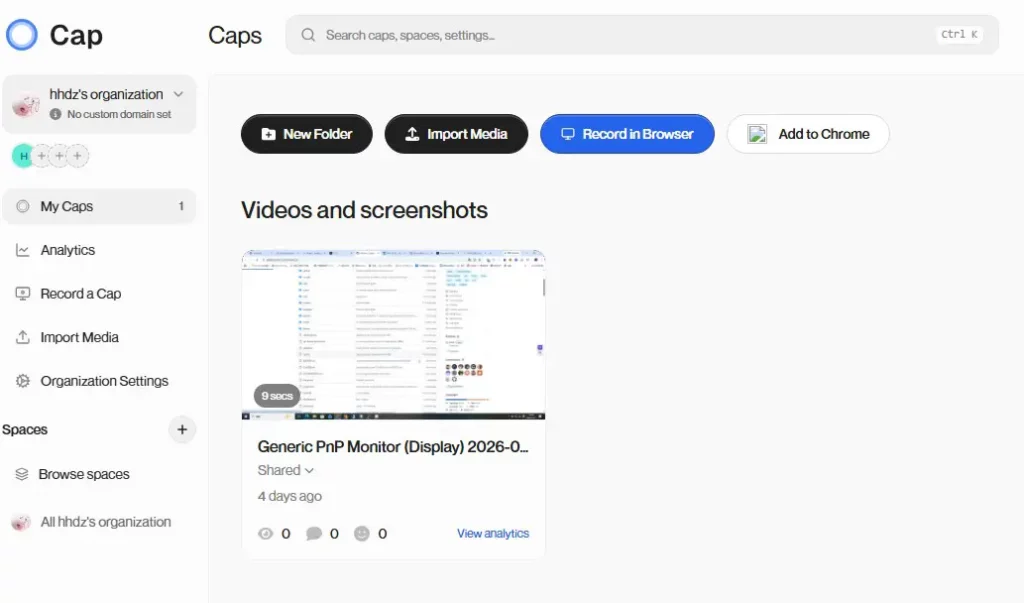
Cap is an open-source screen recording and sharing platform designed as a direct alternative to Loom, but with the key difference that you can self-host it entirely. Recording, storage, and sharing all happen on your own server.
Key Features of Cap:
- Open-source and free, under the MIT License
- Supports simultaneous screen and webcam recording
- Automatically generates shareable links, no third-party uploads needed
- Built-in AI summarization (supports integration with local LLMs)
- Offers macOS / Windows desktop clients
This article chronicles my complete journey deploying Cap on a Synology NAS, including the 5 major pitfalls I encountered and the eventual success with local AI integration. If you’re looking to build your own screen recording platform, just follow along!
Pre-Deployment Checklist
What You’ll Need
| Item | Requirement |
|---|---|
| Synology NAS | DSM 7.2+, 4GB+ RAM recommended |
| Docker | Container Manager installed (search in Package Center) |
| SSH Access | Control Panel → Terminal & SNMP → Enable SSH service |
| Domain + SSL Certificate | For HTTPS reverse proxy (can use free Let’s Encrypt) |
| Nginx Proxy Manager | Docker-deployed HTTPS reverse proxy tool |
Why is HTTPS necessary? The browser’s screen recording API (
getDisplayMedia) requires a secure context and cannot be called under HTTP. This is the most easily overlooked prerequisite for the entire deployment.
Broadband Port Considerations
Many ISPs block ports 80 and 443. If this applies to you, you’ll need to choose an alternative port (we’ll use 183 as an example in this guide). This won’t affect functionality; you’ll just need to include the port number in your access URL.
Overall Architecture at a Glance
Let’s start with the big picture to understand the relationships between components. This will save you a lot of headache during troubleshooting.
                         Internet
                           │
                   Nginx Proxy Manager
                    (Self-hosted on Synology, listening on :183)
                    ┌─────────┬─────────┐
                    │         │         │
               HTTPS:183   MinIO Internal Direct Access
                    │
               cap-web:3000
                    │
          ┌────────┼────────┬──────────┐
          ▼        ▼        ▼          ▼
       MySQL    MinIO    media-     AI-Proxy
       (named   (internal   server    (self-signed SSL)
       volume)  direct)    (FFmpeg)       │
                                  Local AI Server
(llama-server)Three Design Principles (learned the hard way after hitting several roadblocks):
- HTTPS for those who need it — Cap Web uses Nginx Proxy Manager (screen recording API requires a secure context), while MinIO uses internal HTTP (simpler and more reliable).
- Reuse images, don’t compile — Use pre-built Docker images exclusively; avoid installing Bun / Rust toolchains on the NAS.
- Integrate into Compose where possible — Containerize the AI proxy within Docker Compose for unified lifecycle management with Cap.
Step 1: Docker Compose Orchestration
Create a project directory on your NAS and write the docker-compose.yml file. This setup involves 6 containers:
| Container | Image | Purpose |
|---|---|---|
cap-web |
ghcr.io/capsoftware/cap-web:latest |
Next.js main application + API + authentication |
cap-media-server |
ghcr.io/capsoftware/cap-media-server:latest |
FFmpeg video transcoding |
cap-mysql |
mysql:8.0 |
Database |
cap-minio |
minio/minio:latest |
S3-compatible object storage |
cap-minio-setup |
minio/mc:latest |
Automated bucket creation (one-time task) |
cap-ai-proxy |
nginx:alpine |
Transparent proxy for OpenAI API → local AI |
Key docker-compose.yml Configuration
version: "3.8"

services:
  cap-web:
    image: ghcr.io/capsoftware/cap-web:latest
    container_name: cap-web
    ports:
      - "3000:3000"
    env_file: .env
    extra_hosts:
      - "api.openai.com:172.21.0.100"   # DNS hijacking → AI proxy
    environment:
      NODE_TLS_REJECT_UNAUTHORIZED: "0"  # Accept self-signed certificates
    depends_on:
      cap-mysql:
        condition: service_healthy
      cap-minio:
        condition: service_healthy
    networks:
      - cap-network

  cap-media-server:
    image: ghcr.io/capsoftware/cap-media-server:latest
    container_name: cap-media-server
    env_file: .env
    networks:
      - cap-network

  cap-mysql:
    image: mysql:8.0
    container_name: cap-mysql
    environment:
      MYSQL_ROOT_PASSWORD: ${MYSQL_ROOT_PASSWORD}
      MYSQL_DATABASE: cap
      MYSQL_USER: cap
      MYSQL_PASSWORD: ${MYSQL_PASSWORD}
    volumes:
      - cap-mysql-data:/var/lib/mysql   # ⚠️ Must use a named volume!
    command: >
      --innodb-buffer-pool-size=256M
      --performance-schema=OFF
    deploy:
      resources:
        limits:
          memory: 1G
    healthcheck:
      test: ["CMD", "mysqladmin", "ping", "-h", "localhost"]
      interval: 10s
      timeout: 5s
      retries: 5
    networks:
      - cap-network

  cap-minio:
    image: minio/minio:latest
    container_name: cap-minio
    ports:
      - "9000:9000"
      - "9001:9001"
    environment:
      MINIO_ROOT_USER: ${MINIO_ROOT_USER}
      MINIO_ROOT_PASSWORD: ${MINIO_ROOT_PASSWORD}
      MINIO_API_CORS_ALLOW_ORIGIN: "https://cap.yourdomain.com:183"
    volumes:
      - ./minio:/data    # MinIO is not affected by ACLs, bind mounts are fine
    command: server /data --console-address ":9001"
    healthcheck:
      test: ["CMD", "curl", "-f", "http://localhost:9000/minio/health/live"]
      interval: 10s
      timeout: 5s
      retries: 5
    networks:
      - cap-network

  cap-minio-setup:
    image: minio/mc:latest
    container_name: cap-minio-setup
    depends_on:
      cap-minio:
        condition: service_healthy
    entrypoint: >
      /bin/sh -c "
      mc alias set local http://cap-minio:9000 ${MINIO_ROOT_USER} ${MINIO_ROOT_PASSWORD};
      mc mb local/cap --ignore-existing;
      mc anonymous set download local/cap;
      "
    networks:
      - cap-network

  cap-ai-proxy:
    container_name: cap-ai-proxy
    image: nginx:alpine
    volumes:
      - ./ai-proxy.conf:/etc/nginx/conf.d/default.conf:ro
      - ./ai-certs:/etc/nginx/certs:ro
    networks:
      cap-network:
        ipv4_address: 172.21.0.100   # Static IP for DNS hijacking

volumes:
  cap-mysql-data:

networks:
  cap-network:
    driver: bridge
    ipam:
      config:
- subnet: 172.21.0.0/16 # Must specify a subnet to assign static IPsWhy use a named volume for MySQL instead of a bind mount? This was the first major pitfall, which we’ll detail below.
Step 2: Environment Variable Configuration
Create a .env file in your project directory:
# ====== Database ======
MYSQL_ROOT_PASSWORD=your_root_password
MYSQL_PASSWORD=your_cap_user_password

# ====== MinIO Storage ======
MINIO_ROOT_USER=your_minio_username
MINIO_ROOT_PASSWORD=your_minio_password

# ====== Cap Access URL ======
CAP_URL=https://cap.yourdomain.com:183
S3_PUBLIC_URL=http://<NAS_IP>:9000          # ⬅ Internal network direct access, no reverse proxy

# ====== AI Configuration ======
OPENAI_API_KEY=local-llama                   # Placeholder value, local AI doesn't need a real key
GROQ_API_KEY= # ⬅ Leave empty! Otherwise, Groq will be prioritized and failRegarding
S3_PUBLIC_URL: This specifies your NAS’s internal IP. The browser will directly access MinIO on your internal network to upload videos. This design was crucial after overcoming the fourth pitfall, which we’ll explain later.
Step 3: HTTPS Reverse Proxy Setup
Cap Web *must* be accessed via HTTPS; otherwise, the screen recording API won’t work, and login verification codes will fail.
Configuring Nginx Proxy Manager
- Add a new Proxy Host in NPM.
- Domain:
cap.yourdomain.com - Scheme:
https - Forward Hostname:
<NAS_IP> - Forward Port:
3000 - SSL: Select your wildcard certificate (or request a Let’s Encrypt one).
If your ISP blocks port 443, don’t worry about it in NPM’s Settings → Default Host. You can simply specify your non-standard port directly in the Proxy Host configuration.
Connecting the Desktop Client
The Cap Desktop client also supports connecting to self-hosted instances. In the client settings, enter:
- Cap Server URL:
https://cap.yourdomain.com:183
5 Real-World Pitfalls and Solutions
This section contains the most valuable insights of this guide. These 5 issues were interconnected; solving one often exposed the next. If you follow the steps above, you’ll likely encounter these same challenges.
Pitfall 1: MySQL Permission Denied (Synology ACLs)
Symptom: MySQL container fails to start, with logs showing:
mysqld: Can't create/write to file '/var/lib/mysql/is_writable' (OS errno 13 - Permission denied)Troubleshooting Process:
My first thought was permissions. I tried chown 999 and chmod 777, and ls -lad showed drwxrwxrwx+ — notice that + sign. This indicates Synology’s btrfs file system’s extended ACLs (synoacl), which intercept container write operations even beyond standard POSIX permissions.
Solution: Change MySQL’s storage from a bind mount to a Docker named volume:
# ❌ Incorrect: Bind mounts are affected by Synology ACLs
volumes:
  - ./mysql:/var/lib/mysql

# ✅ Correct: Named volumes bypass host file system ACLs
volumes:
- cap-mysql-data:/var/lib/mysqlNamed volumes are managed directly by Docker, bypassing the host’s file system ACL layer, which resolves the issue at its root.
Pitfall 2: Login Verification Code Failure
Symptom: You receive a verification code in your email, but entering it on the webpage results in a failure. Opening browser DevTools reveals that the cookie was never set.
Root Cause: NextAuth, by default, enables secure: true, meaning cookies are flagged with Secure. Browsers will only send such cookies over HTTPS connections. If you access Cap via HTTP + internal IP, the browser simply rejects the cookie.
Solution: This is why Step 3 emphasized configuring an Nginx Proxy Manager with HTTPS. Once HTTPS was properly set up, verification code login immediately worked.
Pitfall 3: Uploads Permanently Stuck
Symptom: After recording, the browser displays Uploading..., but the video never uploads. Checking cap-web logs reveals:
`x-forwarded-host` header with value `cap.yourdomain.com` does not match
`origin` header with value `cap.yourdomain.com:183` from a forwarded
Server Actions request. Aborting the action.Root Cause: When Nginx Proxy Manager forwards to a non-standard HTTPS port (like :183), it implicitly drops the port number from the X-Forwarded-Host header. Next.js Server Actions perform strict validation between the forwarded host and origin headers, and a port mismatch causes the request to be rejected.
Troubleshooting Journey:
- Added
proxy_set_header X-Forwarded-Host $http_host;in NPM’s Custom Nginx Configuration — ineffective, NPM’s location block overrides server-level custom configurations. - Hardcoded
proxy_set_header X-Forwarded-Host cap.yourdomain.com:183;— still ineffective, same reason as above.
Eventual Solution: Initially, I added an intermediate Nginx container in Compose to forcefully inject the correct X-Forwarded-Host header. However, this solution was later removed after Pitfall 4 was solved, as the final architecture no longer required it.
Lesson Learned: If you’re using the standard 443 port, you’ll likely avoid this issue. This problem typically arises from the combination of a non-standard port + NPM + Next.js Server Actions.
Pitfall 4: MinIO Upload 403 Forbidden
Symptom: After resolving Pitfall 3, uploads still get stuck, but the X-Forwarded-Host error is gone from the logs. Opening the browser’s Network panel, I found that PUT requests to MinIO returned 403 Forbidden, with the response header Server: openresty — indicating NPM was responding, not MinIO itself.
Investigation Chain:
Cap generates pre-signed URL
  → Browser uses URL to access MinIO via NPM
    → NPM (openresty) modifies certain headers (e.g., Host header)
      → S3 signature validation fails
→ 403 ForbiddenRoot Cause: NPM, during forwarding, likely altered critical headers within the S3 pre-signed URL, causing MinIO’s signature validation to fail. S3 pre-signed URLs are highly sensitive to headers; any modification will lead to a signature mismatch.
Final Solution: MinIO bypasses NPM; direct browser access via internal IP.
S3_PUBLIC_URL=http://<NAS_IP>:9000Simultaneously, adjust MinIO’s CORS configuration to allow access from your domain:
MINIO_API_CORS_ALLOW_ORIGIN: "https://cap.yourdomain.com:183,http://<NAS_IP>:3000"This solution assumes the browser and NAS are on the same internal network. If your use case requires external access to videos, you’ll need to configure a separate HTTPS domain specifically for MinIO.
Pitfall 5: Orphaned Container Port Conflict
Symptom: After resolving Pitfall 4, I removed the intermediate proxy container and rebuilt the setup, only to receive an error:
Bind for 0.0.0.0:3000 failed: port is already allocated
Found orphan containers ([cap-web-nginx]) for this project.
Root Cause: Containers removed from docker-compose.yml are not automatically deleted. The orphaned cap-web-nginx container was still occupying port 3000.
Fix:
docker rm -f cap-web-nginx && docker compose up -dOne command, problem solved. But if you’re unaware of this mechanism, you could waste a significant amount of time on this error.
Pitfall Timeline Summary
| Order | Problem | Root Cause | Fix |
|---|---|---|---|
| 1 | MySQL Permission Denied | Synology btrfs extended ACLs | Switched to Docker named volume |
| 2 | Verification Code Login Failed | NextAuth secure cookie requires HTTPS | Configured NPM HTTPS reverse proxy |
| 3 | Uploads Stuck | NPM dropped X-Forwarded-Host port | Nginx intermediary to inject header |
| 4 | MinIO 403 Forbidden | NPM interfered with S3 pre-signed URL validation | MinIO direct browser access via internal IP |
| 5 | Port Conflict | Removed container not automatically deleted | docker rm -f to clean up |
Local AI Integration: Automating Video Summaries
Cap includes a built-in AI summarization feature that automatically generates a text summary of your video after recording. Officially, it supports three AI Providers:
| Provider | Environment Variable | Purpose |
|---|---|---|
| Groq | GROQ_API_KEY |
LLM summarization |
| OpenAI | OPENAI_API_KEY |
LLM summarization (fallback) |
| Deepgram | DEEPGRAM_API_KEY |
Speech-to-text |
However, there’s a catch: Cap’s source code hardcodes the OpenAI API endpoint as https://api.openai.com/v1/chat/completions and does not support an OPENAI_BASE_URL environment variable. This means you can’t directly point requests to a local large language model.
Solution Approach: DNS Hijacking + Self-Signed Certificate + Nginx Proxy
Without modifying Cap’s source code, we can redirect requests through a three-layer forwarding mechanism:
Inside cap-web container:
  fetch("https://api.openai.com/v1/chat/completions")
      │
      ▼ extra_hosts resolution (DNS hijacking)
  172.21.0.100 (cap-ai-proxy, static IP)
      │
      ▼ nginx 443 self-signed SSL → forwards to local AI
llama-server (OpenAI-compatible interface)Local AI Environment
You’ll need a machine with a GPU to run llama.cpp‘s llama-server. It natively provides an OpenAI-compatible /v1/chat/completions endpoint and does not require an API Key.
Recommended models (for 12GB VRAM):
- Gemma Series Coding Quantized Versions — 64K context, strong code understanding
- Qwen Series Quantized + Multimodal Versions — 32K context, supports image understanding
Example startup command:
llama-server -m your-model.gguf --port 8080 --host 0.0.0.0AI Proxy Nginx Configuration
Create ai-proxy.conf:
server {
    listen 443 ssl;
    server_name api.openai.com;

    ssl_certificate     /etc/nginx/certs/api.openai.com.crt;
    ssl_certificate_key /etc/nginx/certs/api.openai.com.key;

    proxy_read_timeout 180s;       # llama-server can be slow, allow sufficient timeout
    proxy_send_timeout 180s;

    location / {
        proxy_pass http://<AI_SERVER_IP>:8080;
        proxy_http_version 1.1;
        proxy_buffering off;       # Supports SSE streaming responses
        proxy_cache off;
    }
}Generating Self-Signed Certificates
mkdir -p ai-certs && cd ai-certs
openssl req -x509 -nodes -days 3650 -newkey rsa:2048 \
  -keyout api.openai.com.key \
  -out api.openai.com.crt \
-subj "/CN=api.openai.com"Verifying Connectivity
# Test from within the cap-web container to see if it can reach the local AI via proxy
docker exec cap-web wget -qO- https://api.openai.com/v1/models --no-check-certificate
# Expected return: JSON list of models from llama-serverIf you see a JSON list of models, the entire chain is working! Now, after recording a video, Cap will automatically call your local large language model to generate a summary — with zero API fees and all data remaining within your internal network.
Quick Reference for Daily Operations
Common Commands
cd /volume2/docker/cap

# View all container statuses
docker compose ps

# View logs
docker compose logs --tail=50 cap-web
docker compose logs --tail=50 cap-media-server

# Search for login links (find in logs if email is not configured)
docker logs cap-web 2>&1 | grep -i "signin\|callback\|token"

# Check AI connectivity
docker exec cap-web wget -qO- https://api.openai.com/v1/models --no-check-certificate

# Update images
docker compose pull && docker compose up -d

# Restart a single service
docker compose restart cap-webData Backup
# MySQL automated backup (can be added to Synology Task Scheduler)
docker exec cap-mysql mysqldump -u cap -p<password> cap > /volume2/backup/cap_$(date +%Y%m%d).sql

# MinIO video files
# Simply back up the ./minio directoryDisk Usage Check
du -sh /volume2/docker/cap/*
docker system df # View overall Docker disk usageFrequently Asked Questions (FAQ)
Q1: What are the advantages and disadvantages of Cap compared to Loom?
Honestly, Cap’s feature maturity isn’t quite on par with Loom yet. Its video editing capabilities are limited, and mobile support is minimal. However, its advantages are clear: your data is entirely in your control, there are no recording duration limits, and you can connect local large language models for summarization, costing you zero API fees. If privacy and cost are your priorities, Cap is worth a try. If you need an out-of-the-box, seamless team collaboration experience, Loom is currently less hassle.
Q2: How much RAM does Cap deployment require?
A Synology NAS with at least 4GB of RAM is recommended. MySQL is capped at 1GB, Cap Web and Media Server each require several hundred MBs, plus MinIO and system overhead, making 4GB the bare minimum. If you’re running AI models concurrently, a dedicated AI server is advisable.
Q3: Does MinIO *have* to be accessed internally? How can I access videos externally?
In the current setup, MinIO is accessed internally to avoid NPM interfering with S3 signatures. If external video access is required, you can configure a separate HTTPS domain for MinIO (bypassing NPM, using MinIO’s built-in TLS or an independent reverse proxy).
Q4: Can I use cloud AI APIs instead of local AI?
Yes, absolutely. Simply fill in your real OPENAI_API_KEY or GROQ_API_KEY in the .env file. No AI proxy configuration is needed then. If you provide both Groq and OpenAI keys, Cap will prioritize Groq.
Q5: What are the implications of using a non-standard port (e.g., 183)?
The primary impact is on the X-Forwarded-Host header. If you use the standard 443 port, Pitfall 3’s issue won’t occur. Non-standard ports require correct port information handling at the reverse proxy layer, as Next.js Server Actions have strict validation for this.
Q6: How do I configure email sending so I don’t have to search logs for login links?
Cap supports the Resend email service. Simply configure RESEND_API_KEY and your sender email address in the .env file. Refer to Cap’s official documentation for specific parameters.
Final Thoughts
The entire deployment process took me about two days, with most of the time spent on troubleshooting. Pitfalls 3 and 4 were the most exhausting — both involved how reverse proxies modify request headers, and these types of issues are incredibly difficult to diagnose directly from logs, requiring browser DevTools to compare request headers for pinpointing the cause.
If you’re planning to deploy Cap, my recommendations are:
- Start with the standard 443 port first; get it working before bothering with non-standard ports.
- Have MinIO accessed directly via the internal network from the get-go; this avoids Pitfall 4 entirely.
- Always use Docker named volumes for MySQL; steer clear of Synology ACL headaches.
- Local AI integration is a nice-to-have; focus on getting the core functionality up and running first.
I hope this tutorial helps you avoid some of the detours I took. If you encounter other issues during deployment, feel free to leave a comment and let’s discuss!
This article is based on practical deployment experience with the Cap open-source project. Please attribute when reproducing.