
A hands-on guide to running large language models on your own hardware, covering LM Studio, Ollama, and Llama.cpp from bare-metal setup to polished workflows. Written for privacy-conscious builders and GPU owners who want local automation without cloud APIs — every step tested on real consumer hardware, with honest notes on what works and what doesn't.
Welcome to the exciting world of local AI! If you’ve ever dreamt of running powerful Large Language Models (LLMs) right on your own machine or server but found yourself drowning in cryptic error messages, then this ultimate guide to local LLM deployment is tailor-made for you.
Whether it’s for privacy, building purely local automation workflows, or simply wanting to squeeze every last bit of compute from your expensive GPU, we’re going to walk you through mastering the holy trinity of local AI in the most straightforward way possible: LM Studio, Ollama, and Llama.cpp.
To make things easier to grasp, let’s use a car analogy: LM Studio is your “fully-equipped automatic sports car,” Ollama is a “modular chassis with API integration,” and Llama.cpp is the “blueprint for a hardcore V8 engine.”
📊 Quick Glance: Unpacking the Differences Between These Local AI Tools
Before we dive into the installation, let’s quickly understand their core functionalities with a comparison table:
| Aspect | Llama.cpp (Underlying Engine) | Ollama (Server Framework) | LM Studio (Desktop Client) |
| Interaction | Pure Command Line (CLI) & Compile Parameters | Minimal CLI Commands (Docker-like) | Full-featured Graphical User Interface (GUI) Desktop Application |
| Model Download Method | Manual download of .gguf files from Hugging Face |
One-command pull via CLI (ollama run) |
In-app search and one-click download |
| Ideal Runtime Environment | Any environment (requires compilation & dependency wrangling) | Ubuntu Servers, NAS, and other headless environments | Windows / Mac desktop PCs |
| Best For | Hardcore C++ developers, extreme hardware optimizers | DevOps, Backend Developers, Automation Workflow Builders | Business users, local compute enthusiasts, beginners |
🚗 1. LM Studio Tutorial: Your Beginner-Friendly “Automatic Sports Car”
Use Case: Quickly test the latest LLMs on a desktop PC with a dedicated GPU (e.g., a decent RTX card). No coding required, just point and click.
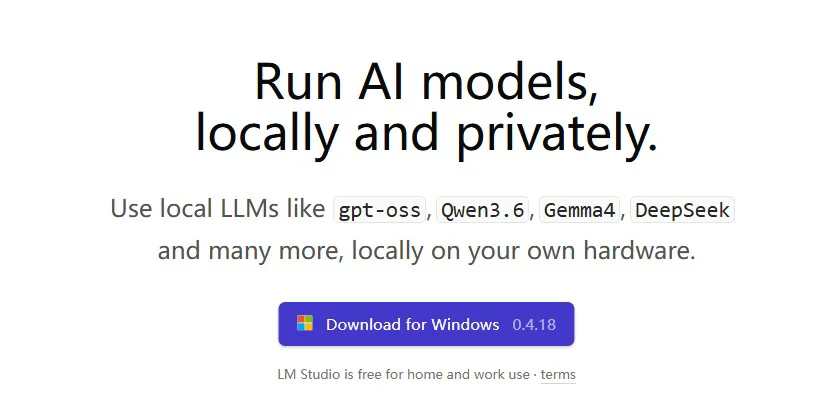
1. Download & Install: Easier Than Installing a Chat App
To kickstart your local LLM journey, the first step is incredibly straightforward:
- Open your browser and visit the official website:
lmstudio.ai. - Download the installer package corresponding to your operating system (Windows, Mac, Linux).
- Double-click to run, follow the “Next” prompts, and you’re good to go.
2. Download Models: Your Built-in AI “App Store”
- Launch LM Studio, and you’ll be greeted by a main interface that feels much like an app store.
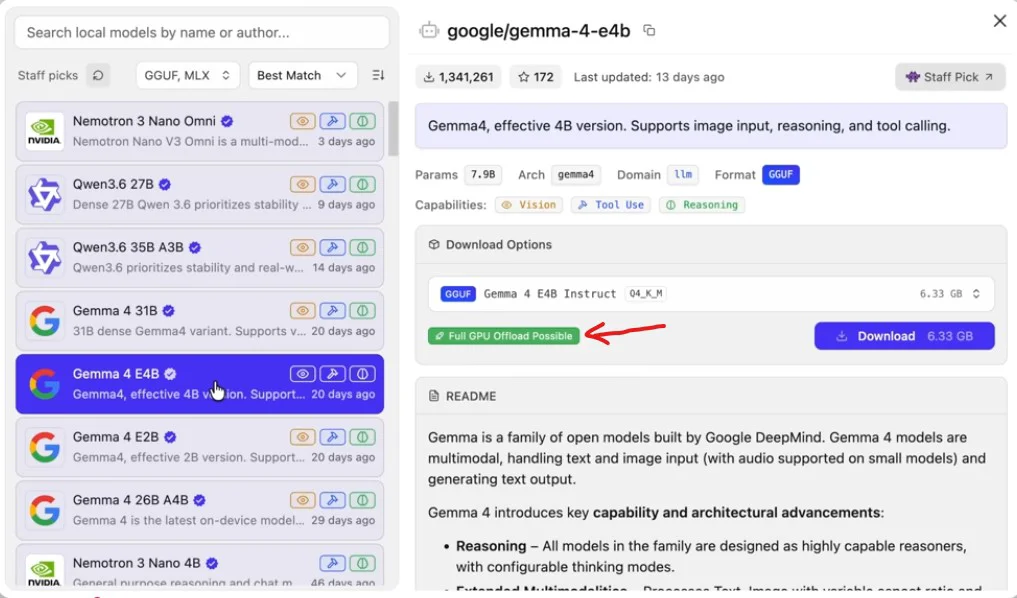
- In the search bar at the top, simply type the name of the open-source LLM you want to explore, such as
Llama-3-8B-InstructorQwen. - Pro Tip: The search results will display a plethora of files. Don’t panic! LM Studio intelligently highlights versions in green with a
Should Worktag, based on your system’s physical RAM and GPU VRAM. - Locate a green-tagged version and click
Downloadon the right.
3. Local Debugging & GPU Acceleration: Squeezing Every Ounce of Performance
- Once downloaded, click the “Chat bubble” icon in the left navigation bar.
- From the dropdown menu in the top-middle, select the model you just downloaded to load it into memory.
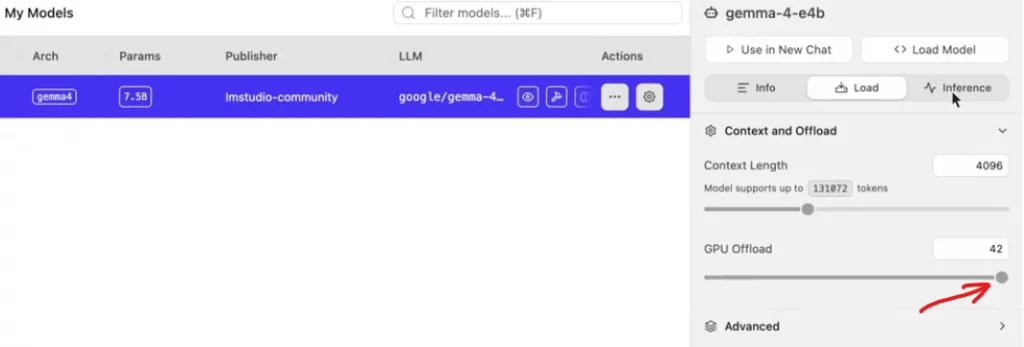
- Key Optimization Tip: Pay close attention to the
GPU Offloadsettings in the right sidebar. Drag theMax GPU loadslider as far right as possible (assuming your GPU has sufficient VRAM). This controls how much of the computation is offloaded to your GPU; the higher the setting, the faster your AI will generate text!
🚙 2. Ollama Installation & Configuration: The ‘Core Chassis’ for Servers and Automation Workflows
Use Case: If you plan to run AI models persistently on an Ubuntu Server in your HomeLab, or want to seamlessly integrate LLMs into tools like n8n automation workflows, immersive translation plugins, and more, Ollama is currently the most robust and hassle-free option.
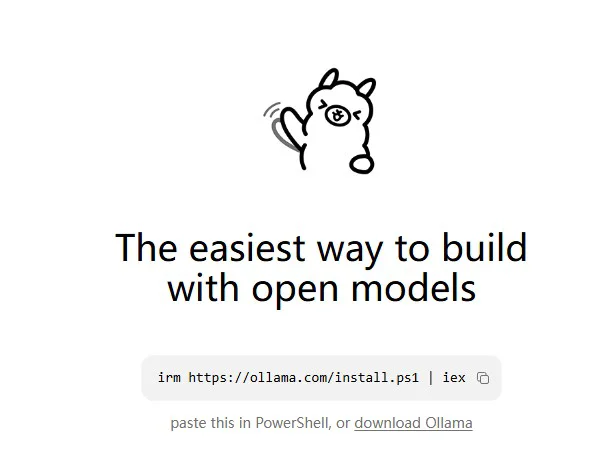
Official Website: https://ollama.com/
1. Ollama One-Command Installation
If you’re on Linux (like a popular Ubuntu Server setup), the installation is incredibly geek-friendly and smooth. Open your terminal, SSH into your server, and paste this magic line of code:
Bash
curl -fsSL https://ollama.com/install.sh | sh
(For Windows or Mac, simply visit ollama.com to download and double-click the installer.)
2. Running LLMs: Just One Line of Code
Ollama’s biggest charm lies in its ability to combine environment setup, model download, and execution into a single, seamless step.
In your terminal, type:
Bash
ollama run qwen2
Ollama will automatically pull the optimized qwen2 model weights from its registry. Once downloaded, it will load the model and present you with a >>> conversation prompt in your terminal. Type your questions, and start chatting with your AI!
3. Advanced Usage: Integrating with Automation Workflows via REST API
At its core, Ollama runs as a background API service, silently listening on port 11434 locally by default.
If you’re building automation systems for tasks like e-commerce data scraping or article rewriting, simply point your requests to http://localhost:11434/v1. Your workflows will instantly gain a local AI brain, ensuring your data never leaves your network and your privacy remains paramount.
🏎️ 3. Llama.cpp Compilation Guide: The ‘V8 Engine’ for Hardcore Geeks
Use Case: For those who want to squeeze every last drop of performance from custom hardware or face specific low-level environment constraints that necessitate compiling from source. Warning: Hardcore command-line operations ahead!
Official Website: https://llama-cpp.com/
1. Get Source Code and Compile
Taking Linux environments with Nvidia GPU (CUDA) acceleration as an example, you’ll first need to clone the source code:
Bash
git clone https://github.com/ggerganov/llama.cpp.git
cd llama.cpp
Next, compile with GPU support parameters:
Bash
make LLAMA_CUDA=1
Once compilation is complete, you’ll have an executable core file named main.
2. Manually Download GGUF Model Files
Llama.cpp strictly relies on quantized model files in the .gguf format.
- Head over to Hugging Face (
huggingface.co). - Search for your desired LLM and navigate to its
Files and versionspage. - Manually download a quantized version (for typical systems, the
Q4_K_Msuffix is recommended as it strikes the best balance between performance and accuracy), and save it into yourllama.cppdirectory.
3. Command-Line Launch and Parameter Tuning
Launch and load the model via the command line:
Bash
./main -m model.gguf -n 512 -c 2048 -ngl 33 --color -i
Key Parameter Breakdown:
-m: Specifies the path to your locally downloaded LLM file.-c: Context Window, defines the size of the context window.-ngl 33: The most critical GPU acceleration parameter! This determines how many neural network layers are offloaded to your graphics card for computation. A higher number consumes more VRAM but also results in faster inference.-i: Enters interactive chat mode.
💡 Summary & Recommendations: Which Local AI Architecture Should You Choose?
By now, you should have a solid understanding of these three powerhouse tools for local AI deployment.
If you’re just dipping your toes into local LLMs, without a doubt, start by downloading LM Studio on your main PC to experience the magic of AI. If you’re a relentless homelab enthusiast or a webmaster looking to build a local, closed-loop system for everything from information scraping and AI-powered content refinement to automated publishing using tools like n8n, then get Ollama deployed on your server right away!
Time to Engage: What hardware configuration are you currently running your LLMs on? Have you encountered any peculiar errors during deployment? Share your experiences in the comments below, and let’s troubleshoot together!
❓ Appendix: Local LLM Deployment Frequently Asked Questions (FAQ)
I’ve deployed Ollama on my internal Ubuntu server, but n8n or other automation tools on the same LAN can’t connect to its API. Why?
A: This is a classic “network binding” issue! By default, Ollama listens only on the local loopback address (127.0.0.1:11434) for security reasons. This means only the server itself can access it. Solution: You need to modify an environment variable to make it listen on all network interfaces.
- Edit Ollama’s service file:
systemctl edit ollama.service - Add the following line under the
[Service]section:Environment="OLLAMA_HOST=0.0.0.0" - Reload configurations and restart the service:
systemctl daemon-reload && systemctl restart ollamaNow, your n8n instance can smoothly call it viahttp://<YOUR_SERVER_LAN_IP>:11434to automate data processing!
I’m used to managing services with tools like Portainer. Does Ollama support containerized deployment?
A: Absolutely, and the experience is excellent! Ollama officially provides a robust Docker image. For users who prefer containerizing environments, pulling the image and running it directly is the cleanest approach. If you have a dedicated GPU and want to enable hardware acceleration within the container, simply add the --gpus=all parameter to your Docker run command (assuming the host machine has the NVIDIA Container Toolkit installed). This keeps your system pristine without sacrificing any AI inference performance.
Why do models I download in LM Studio throw errors or respond incredibly slowly when I try to chat with them?
A: This usually happens because the model is too large, effectively “bursting” your GPU’s Video RAM (VRAM). This forces the system to rely on extremely slow CPU processing and virtual memory to perform calculations. Solution:
- Heed the Green Tags: When searching and downloading models in LM Studio, strictly adhere to the system’s “green highlight” recommendations. Avoid attempting to run models with parameters too large for your hardware.
- Choose Appropriate Quantized Versions: For 8B-class models, a GPU with 8GB or 12GB of VRAM will benefit from downloading versions with
Q4_K_MorQ5_K_Msuffixes. These versions can compress VRAM usage by more than half with minimal impact on AI quality. - Adjust GPU Offload: Back in the chat interface’s right sidebar, moderately reduce the number of layers for
GPU Offloadto reserve some VRAM for your system’s graphical display.